


The other day I was talking to my father-in-law about brand photography. He’s a serial entrepreneur, with tons of experience starting and building various businesses. I found myself explaining to him that professional photographs for your business matter. Not so much because people will be like “oh wow, great photos,” but more so because clients these days have become spoiled and will notice if your photos are not up to the expected standard.
I have immense respect for photographers, and I find myself so inspired by the work that they create. But I also find myself so grateful at how much easier their art makes my job as a web designer.
As a Squarespace web designer working with other creative entrepreneurs, I’ve come to realize the importance of brand photography. A beautiful website with iPhone photos and selfies will not look as great and professional as a beautiful website with professional brand photos. I have also found that having a great library of photos helps me post more consistently on social media!
In this post I’ll explain more about what branding photos are, how they help your website, and how you can go about planning your own branding photo session!
What are brand photos?
Branding photos are simply what you would think they are: photos that show off your brand in a visual way. The purpose of brand photos is to show off more of your personality and the behind the scenes of whatever it is that you do.
For me, this means showing off me working out at my desk, sketching out website wireframes, hanging out with my dog, etc. Basically anything that goes beyond that thing that you do for your clients, that allows your audience to get a peek into who you are, what you value, and how you work!
Capturing these behind the scenes moments make it easier to share with your audience what it is that you do, what sets you apart, and even what makes you unique.
How to plan your branding session:
My very first “branding session” was my husband and I with a DSLR camera (that he had no idea how to use) in our living room. I knew the idea behind branding photos, but we had no idea what we were actually doing.
I recruited him because I needed photos of just me to show off on my website and social media pages. Most of the photos I had of myself were either selfies or group photos, and I was not about to have a photo on my about page that was cropped with someone’s arm still around my shoulder. After looking through the photos my husband took, I quickly came to the realization that I needed someone professional.
Investing in a photographer was actually one of the first real investments I made in my own business, and I’m so glad I did.
I have now completed two real branding sessions with a photographer (and have another one scheduled for next month), and I’ve learned quite a bit about what makes these sessions worth the investment.
When planning your branding session, here are a couple of steps I like to take to make sure I get the most for my money:
Step 1: Find a photographer
This one might seem obvious, but the first step in this process is actually finding a photographer to take your photos. I used to think that any photographer would do, but have since come to realize that there are a couple of things to look for when choosing your photographer.
Here are a couple of things:
-
Style: does the photographer’s style fit your brand aesthetic? No, you can’t (and shouldn’t) just slap a filter on there to make it fit your aesthetic. There are a lot of different photography styles out there, so make sure to find one that fits what you need for your business.
-
Budget: Photographers vary in price range based on experience, so have an idea of your budget and also keep in mind you might want/need to buy some new clothes or other props for your shoot as well.
-
Personality: I recommend talking with the photographer before booking (if possible). You are asking this person to capture your personality, so you want to make sure it’s someone you’re comfortable being yourself around!
Both of my previous shoots were with Madalyn Yates Photography and I noticed a significant difference between how comfortable I was the first time and the second time we shot. By our second shoot Madalyn also knew me a lot better, so she was able to get out more of my natural side rather than a pose for the camera side, which I loved!
Step 2: Prepare your outfits and props
Once you have your photographer and a date set for your shoot, it’s time to start preparing your props and outfits. Make sure to chat with your photographer about how long your shoot is and how many outfits you can have before you go out buying all the things.
You’ll want to wear something on brand or at the very least something that compliments your brand and brand colors. My last photo shoot was done before my brand was finalized, but I had an idea of the aesthetic and vibe I wanted, so I picked my outfit based on that. It’s also a great idea to wear some jewelry and a little bit more makeup than you’d normally wear (but still feel comfortable with).
This might sound obvious, but make sure that your clothes are clean and wrinkle free before your shoot as well!
The more you give your photographer to work with, the more creative they can be in showcasing your passion and talent. I love including props in photoshoots, and here are a couple of
ideas from a web designer perspective (these can obviously be adapted to fit your brand):
-
Drawings, sketches, etc
-
Coffee mugs, coffee makers
-
Pets
-
Planner, agenda, etc
-
Color swatches, books, headphones, microphone, etc
-
Laptop, iPad, other tech things
The key is to include things that you actually use and feel comfortable with. You can also use extras like flower arrangements, blankets, chairs, and so on. Honestly, whatever fits with your overall brand and aesthetic!
Pro tip: if you have anything with your logo on, like business cards, mugs, notebooks, stickers, or anything else, these are also great to include!
Step 3: Figure out the location
Next up – figure out the location. I’ve done my shoots at my house, but this might not work for you! The biggest tip here is to chat with your photographer and see if they have any advice for you.
It could be your house, your office, a coffee shop, downtown location, rented studio etc. My biggest tip here is to just try to make it fit your brand aesthetic as much as possible. If you’re a web designer (and a more casual one at that), photos in a sterile conference room might not be the best for your brand.
Like I mentioned, my shoots have been at my house, wearing jeans, because I want my brand to be very welcoming and inviting!
Step 4: Figure out what types of photos you need
I’m a huge believer in trusting the professionals that we hire. I am honored any time my clients tell me to go lose because they trust me, but I still think it’s important to communicate what we are looking for.
If you show up to your photoshoot with your photographer and say “Ok, take my picture” they will likely do just that. Sure, they might have some of their own creative ideas and take their own spin on it, but if you show up with a “shot list” or a list of inspiration or purposes for the photos, that will help your photographer capture photos you can actually use.
A little note on this; however, please don’t expect the photographer to capture the exact photos from your inspiration boards. But rather use the inspiration as that. Inspiration.
For my last shoot we created a Pinterest inspiration board to visually represent some of the images I would love to have captured, and I also provided my photographer with an idea of how I would be using the photos.
Here are a couple of ideas I gave my photographer last time:
-
I need some images with blank space for words/graphics, etc
-
I need some horizontal images for banners on my website
-
I need some stock image type photos, like my hands on a keyboard, coffeemaker, etc
-
I’d love to incorporate my dog into some of these!
See how these requests give the photographer an idea of how I’m going to use the images, without being overbearing? And here are some of the results from this shoot:
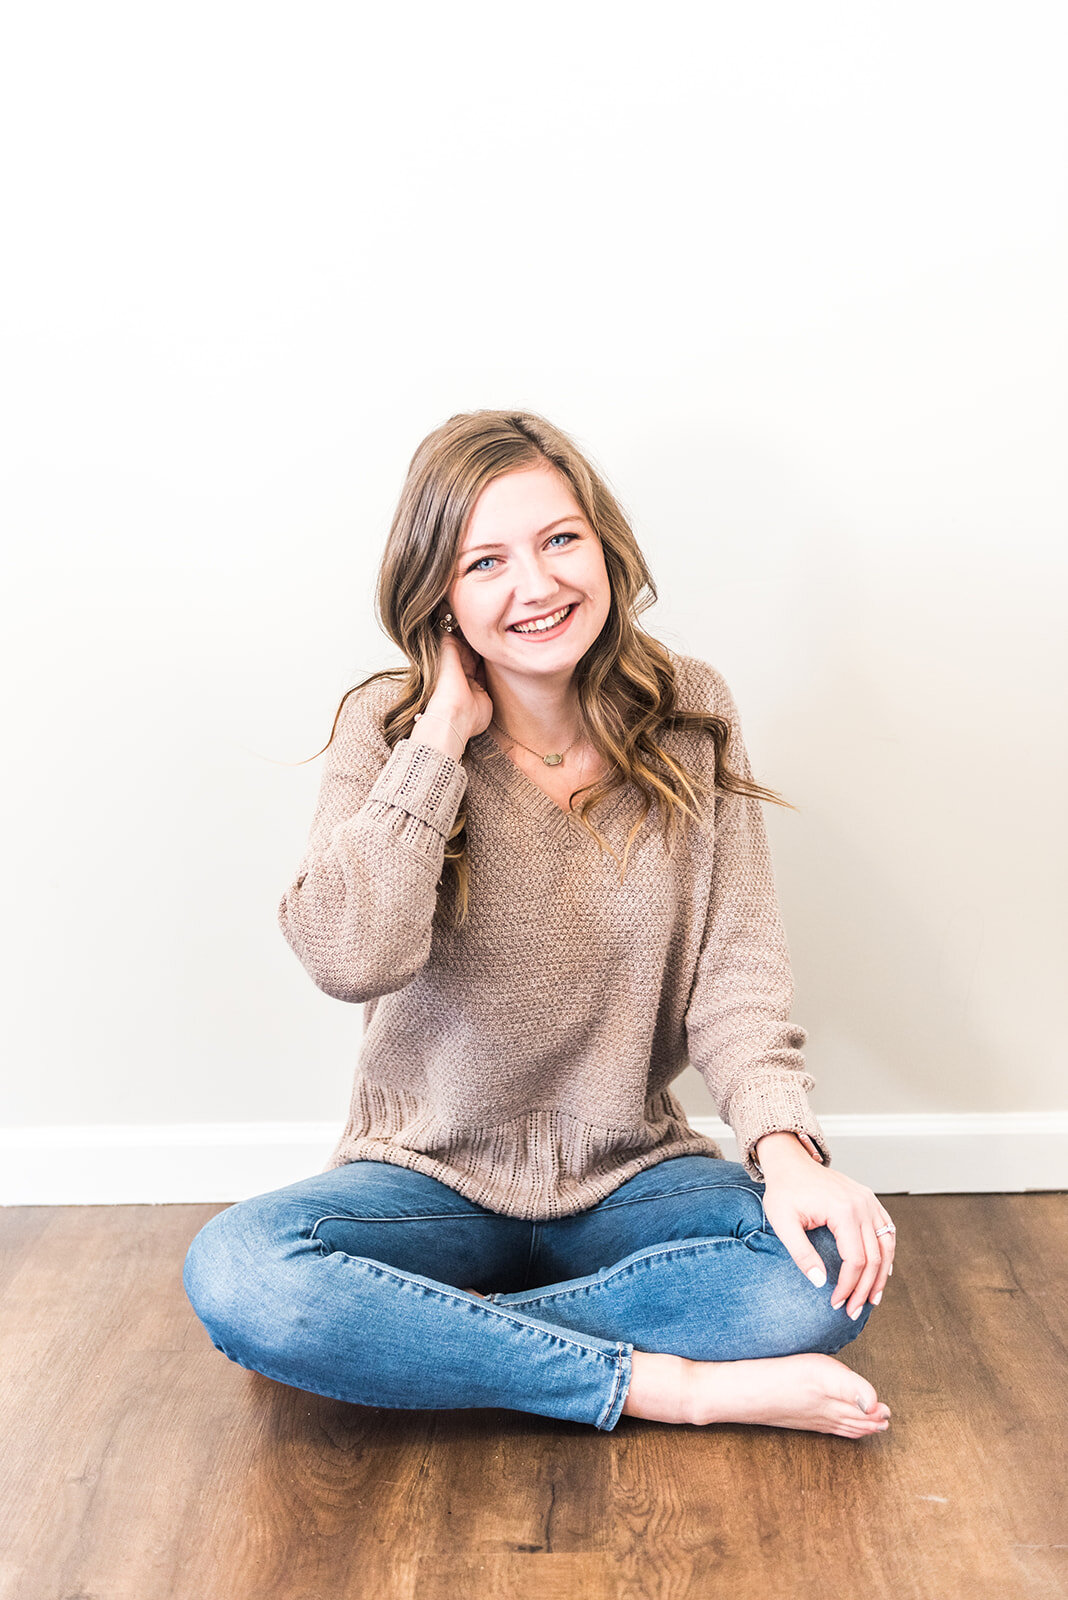
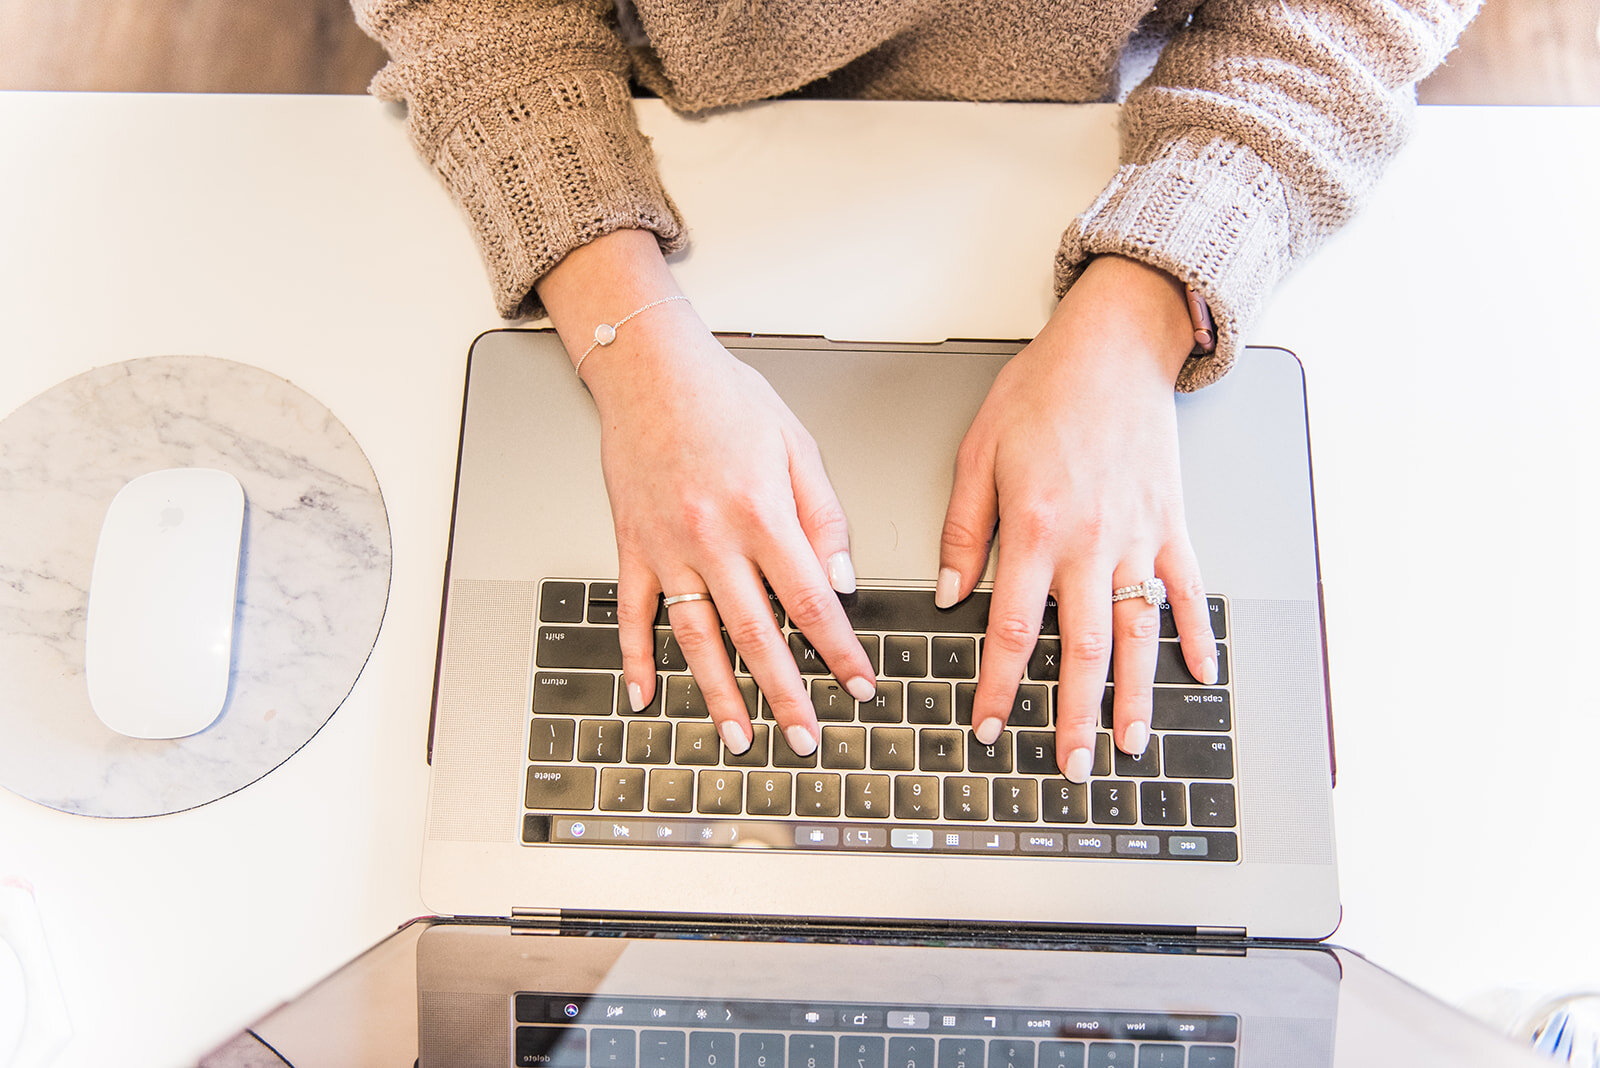

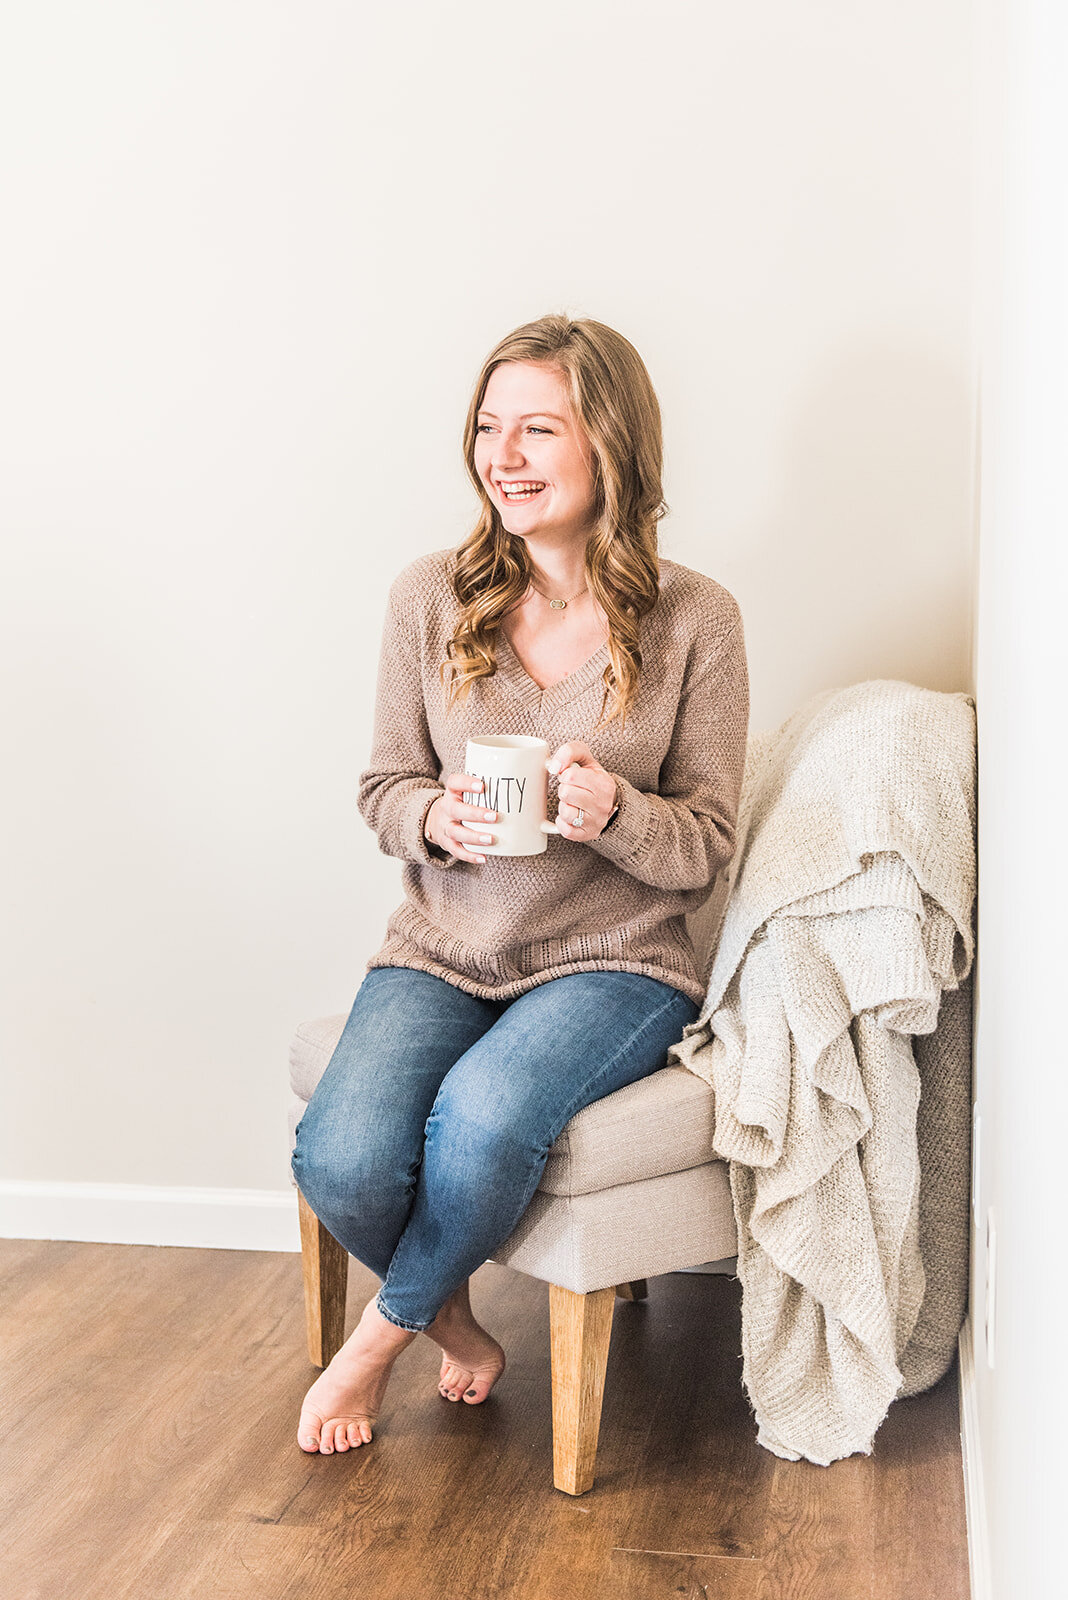
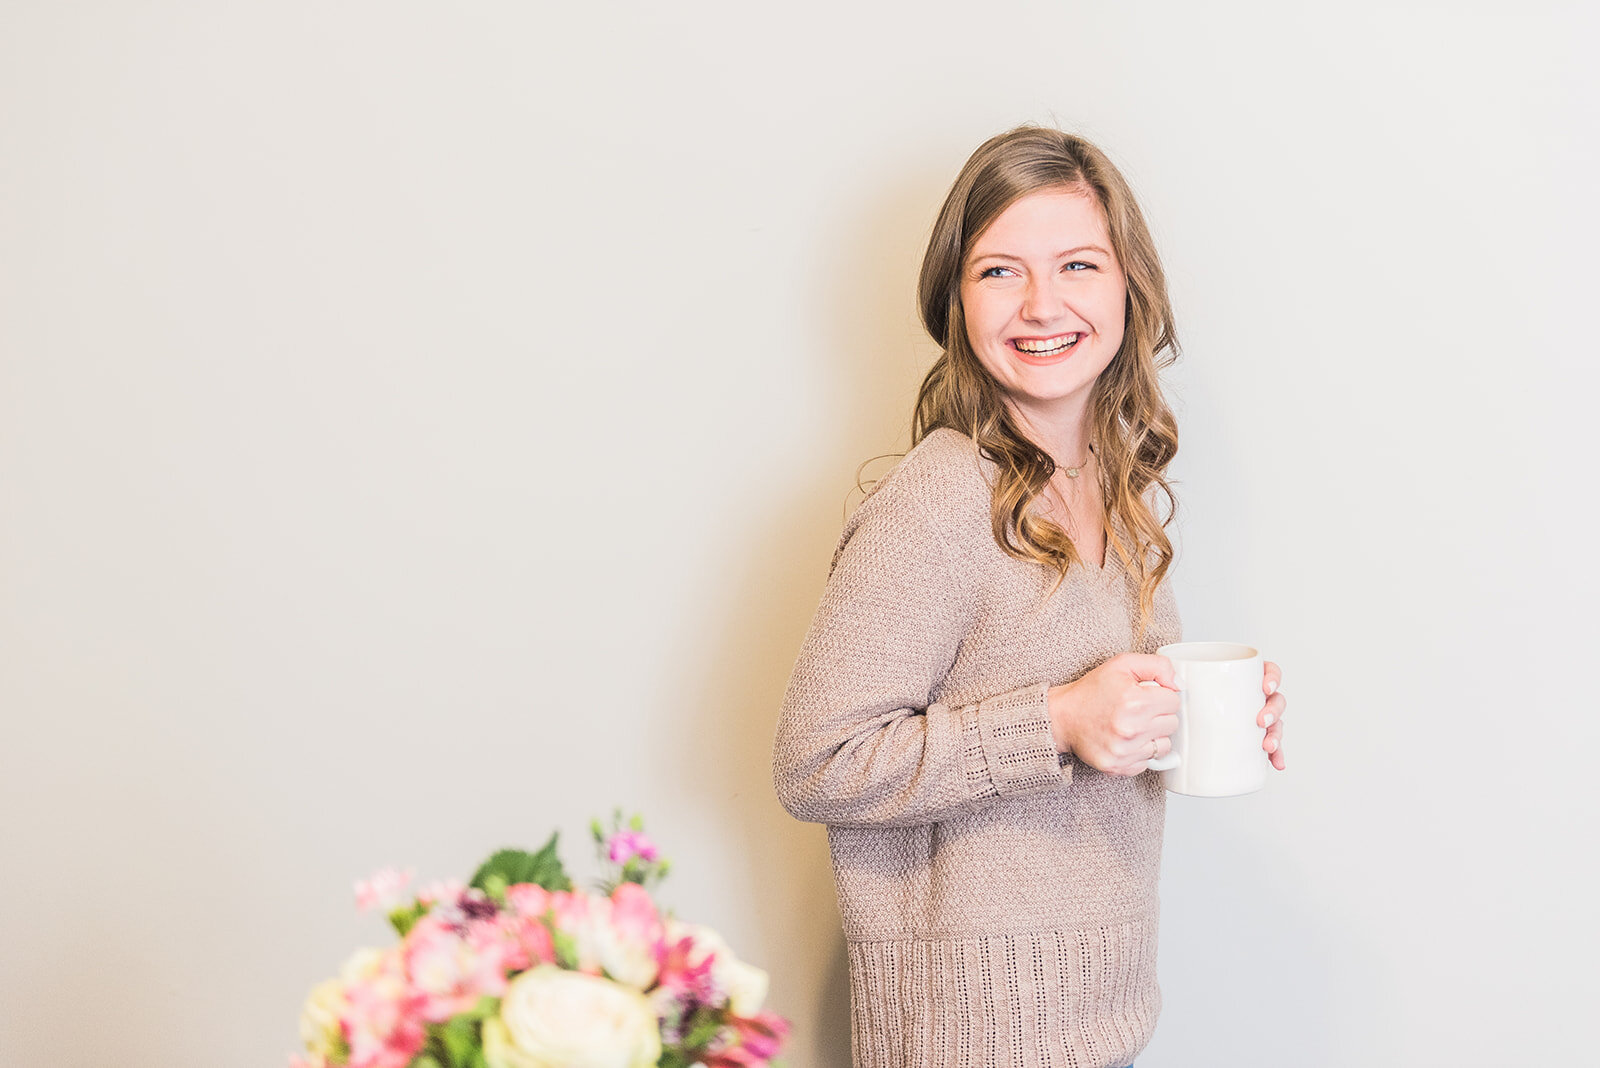
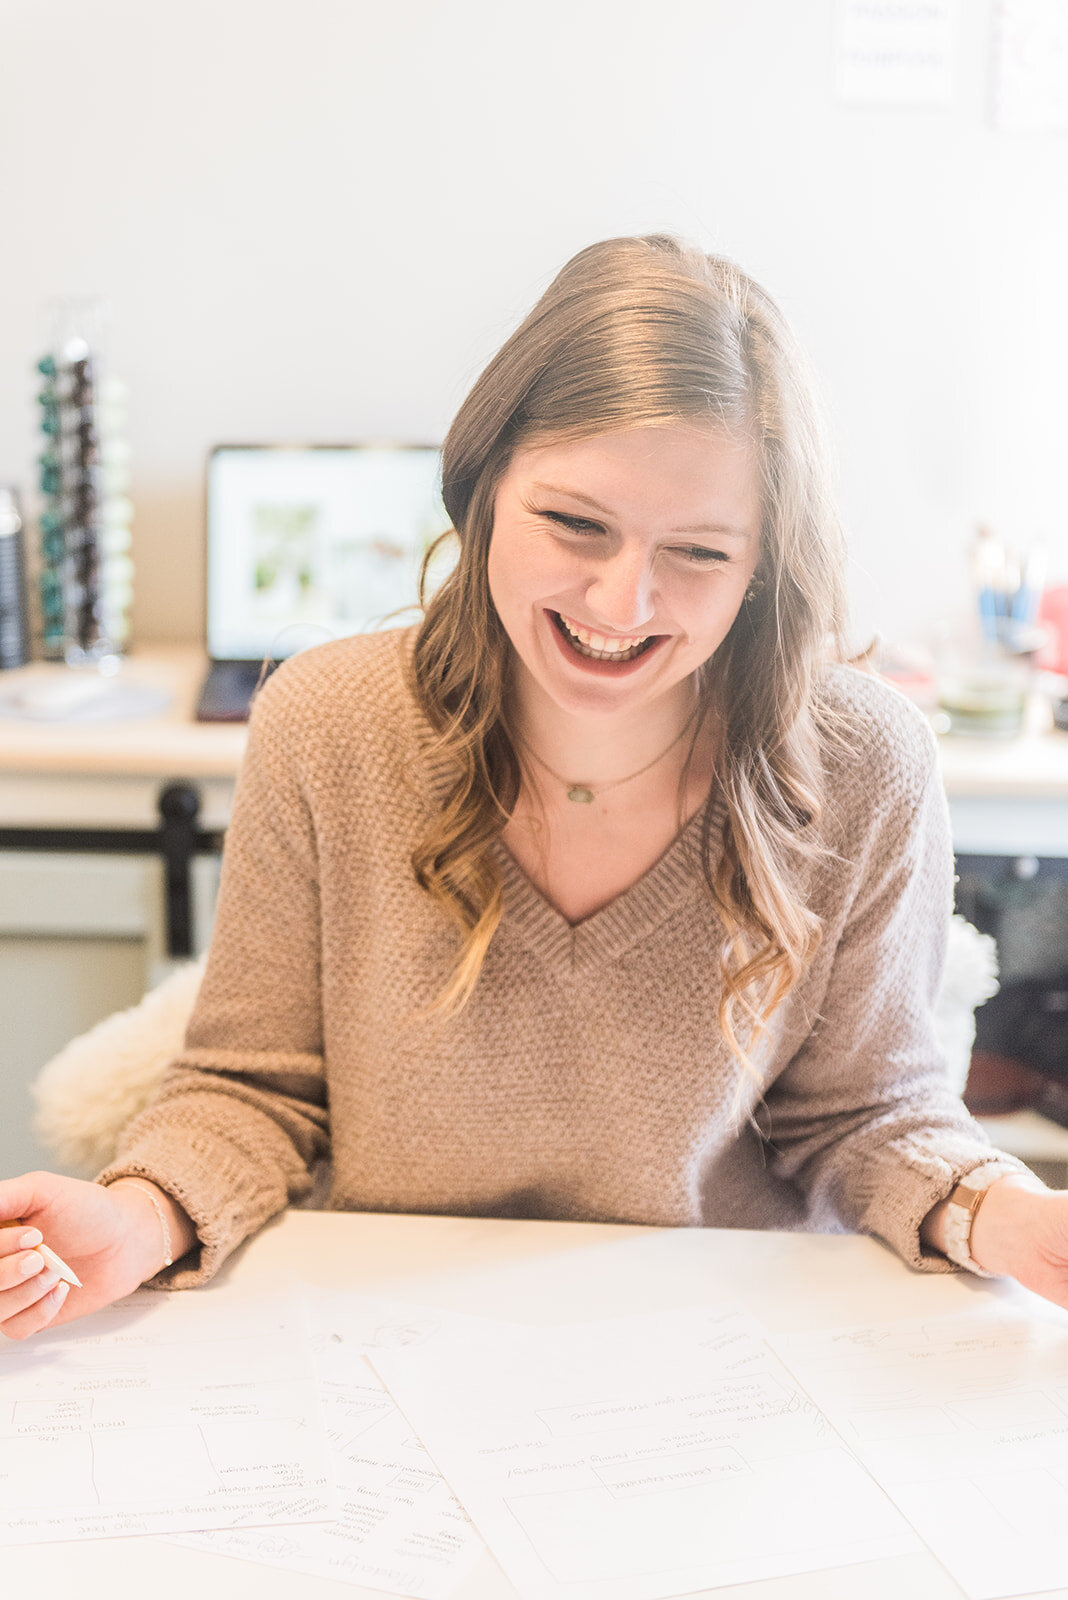
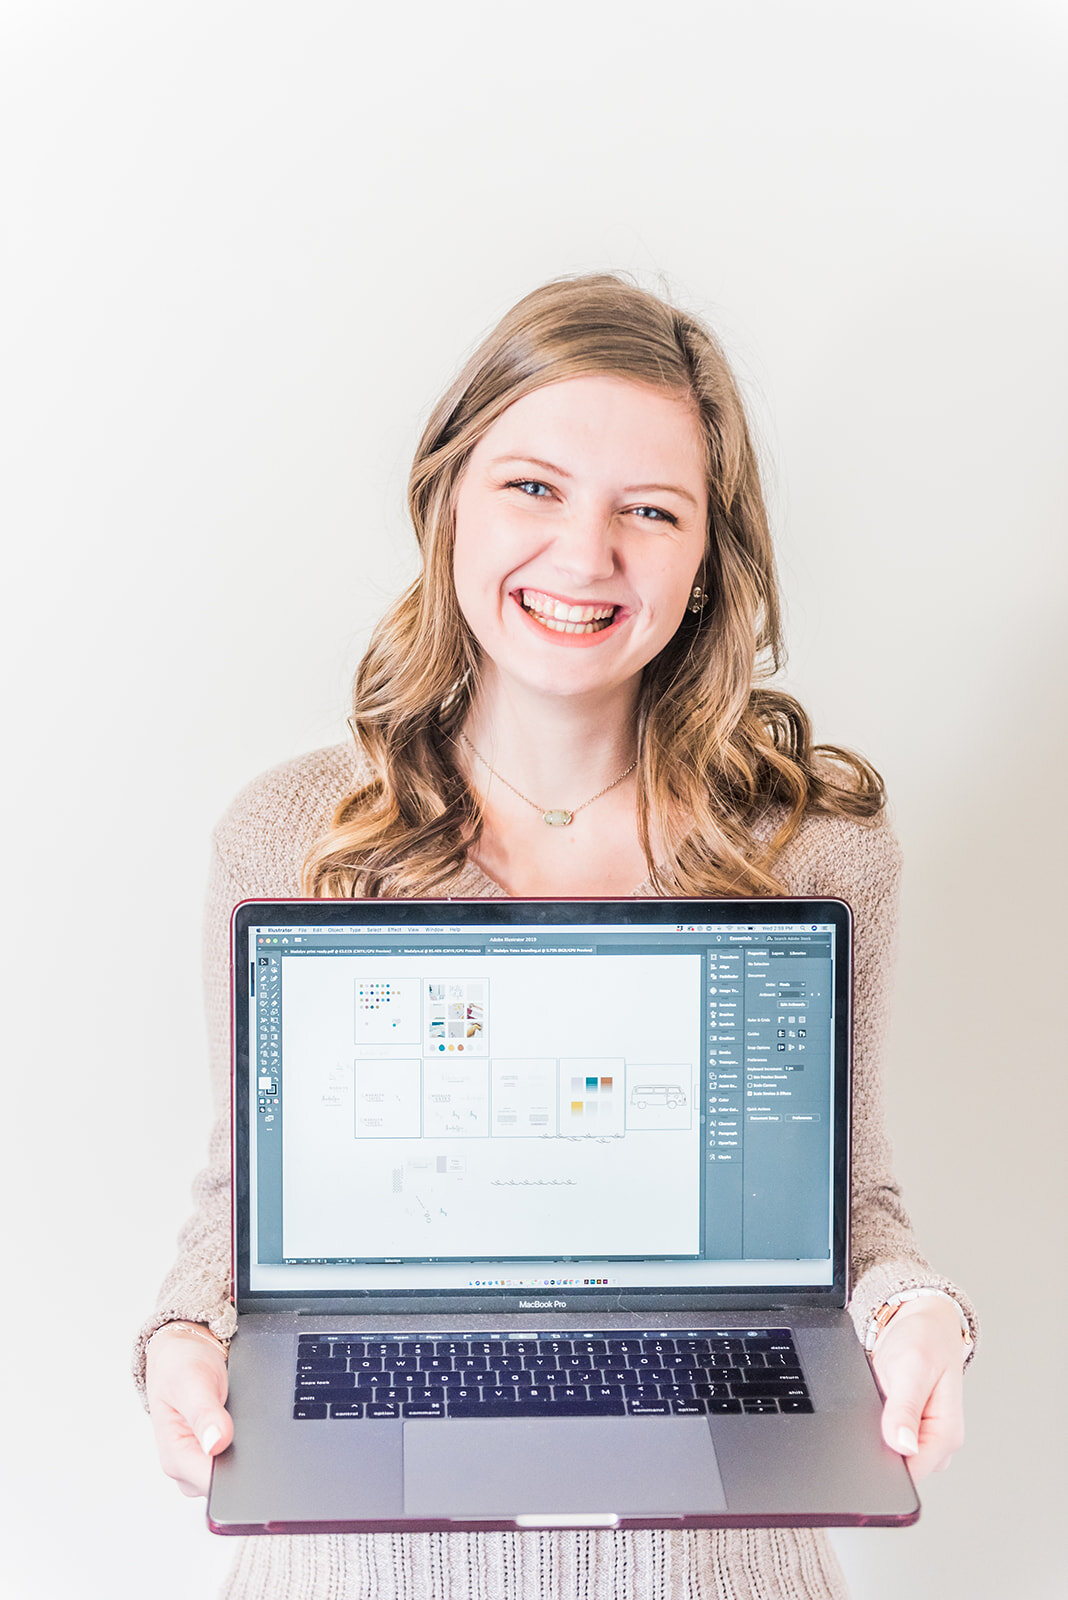
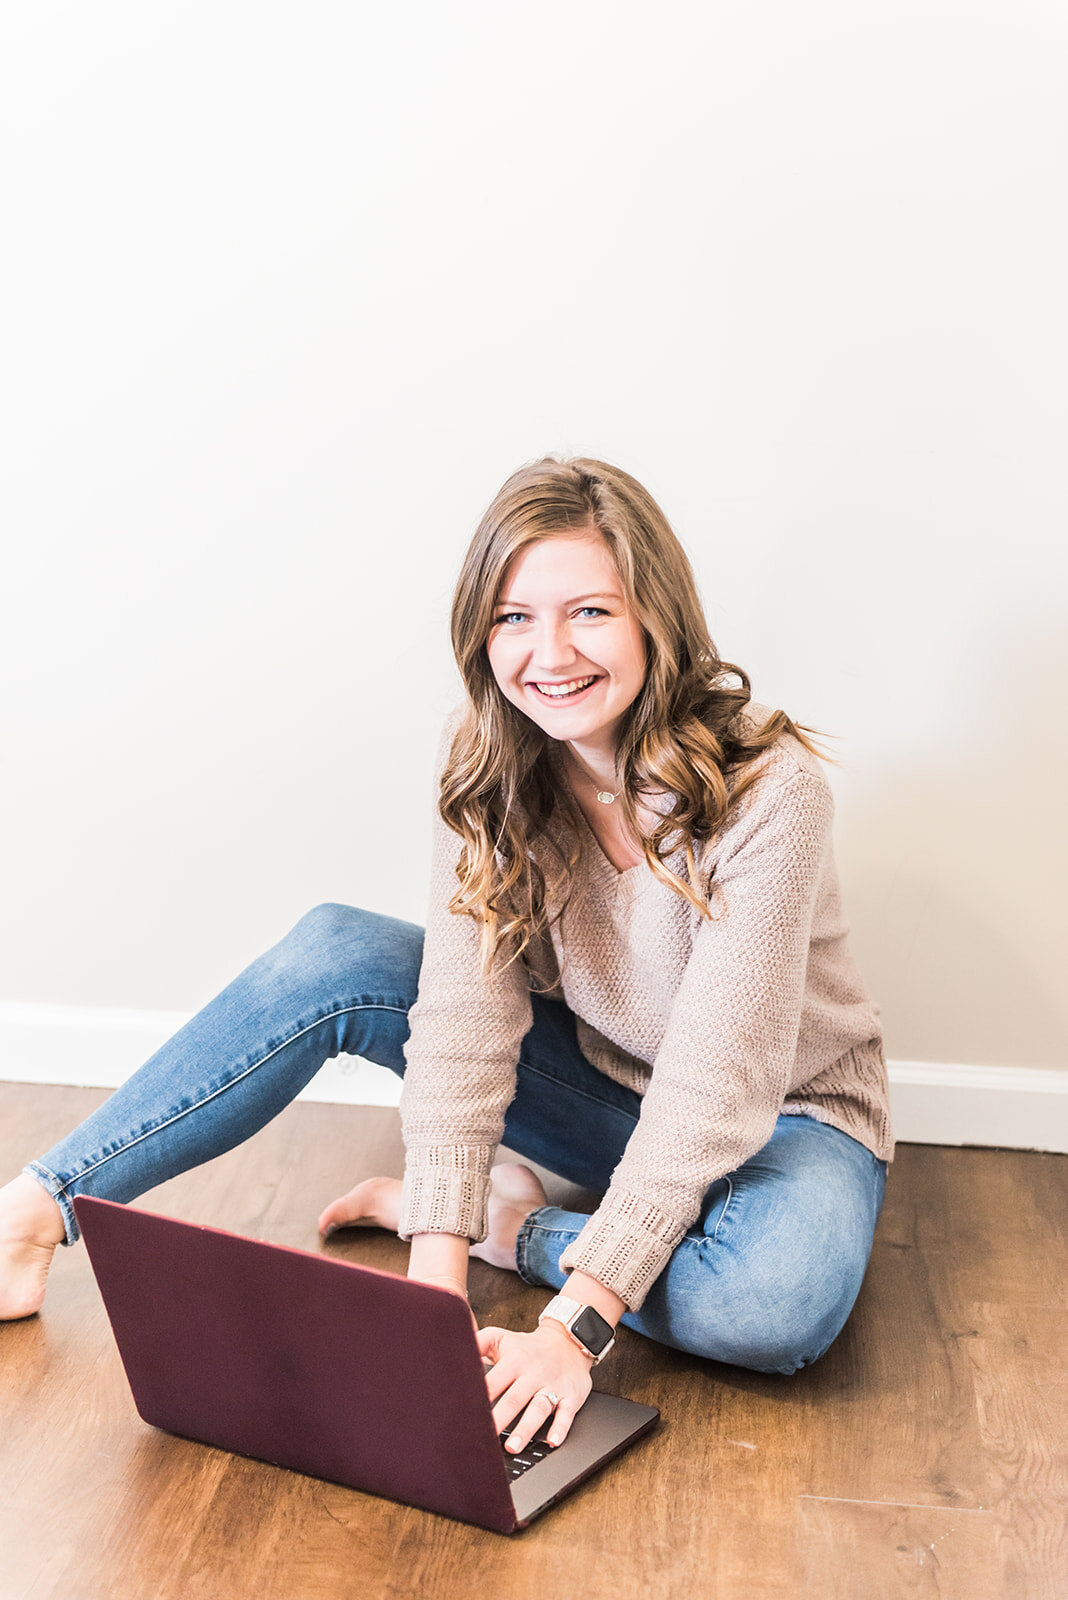
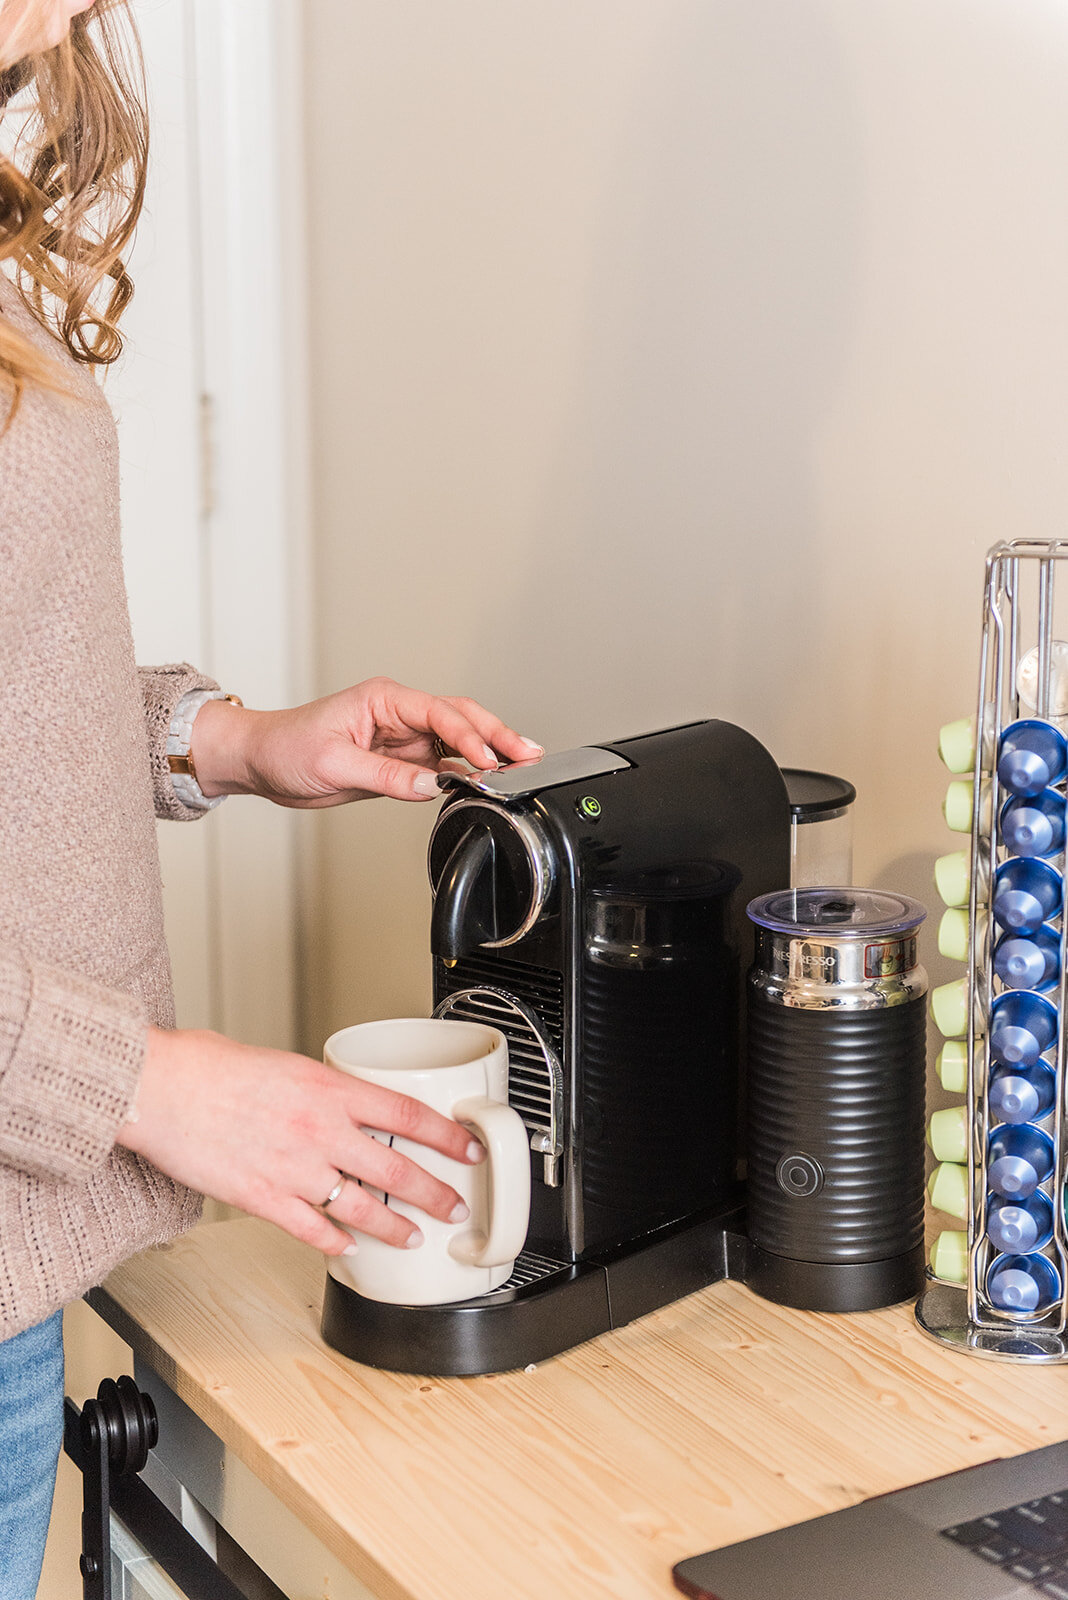
all these photos by Madalyn Yates Photography
Got any questions about brand photography? Leave them below! And as always, if you’re looking for help upleveling your brand and website, learn more about how we can partner to make that happen below:


