


In the world of service based businesses, testimonials have an incredible power. It’s human nature to search for social proof to confirm that we are making a good decision, so featuring raving reviews and testimonials is a great way to help our potential clients feel more confident in their decision.
But how can we display testimonials on Squarespace in a way that is eye catching, fits the overall design of our site, and doesn’t feel boring?
I’ve got the solution for you!
In today’s blog post I’ll share a quick and easy way to show off your testimonials on your Squarespace site!
Setting up testimonials:
If you’ve been around the Hygge Design Co. blog before, you may know I’m a big fan of the Squarespace summary block. This versatile little friend of ours can be used for so much (like styling our entire Squarespace blog page) including styling our testimonials!
Ready to dive into these simple step by step instructions? Let’s go!
Step 1: Set up a separate blog page
The first step to this process is to set up a separate blog page for our testimonials. Don’t let the word blog here confuse you, as this will be something completely different from the blog you use to publish your work and educate visitors!
Make sure that you name your blog something easy to remember (mine is simply called “Testimonials”) and move it to the not linked section of your website!
Step 2: Add in your testimonials
Step two involves actually adding your testimonials to the blog we just set up. For each person you want to showcase, create a separate blog post. The testimonial itself should go in the excerpt section of the blog post (this can be found under the options tab of your blog post editor).
You can also give the blog post a title to keep track of the reviews on the backend. I usually add the name of the client to the title, as a way to organize and easily know which review is which. Don’t worry too much about this though, because the title won’t actually show anywhere!
Step 3: Add your summary block:
The final step to this simple process is adding your testimonials to your website using the summary block.
Head to the section of your page where you’d like to display your testimonials (maybe this is your Home page, your Services page, or somewhere else), select edit then insert the Summary Block.
In the Summary Block Content settings, make sure the Testimonials blog is selected. This will make sure that we are actually pulling the testimonials, and not your regular blog (or something else).

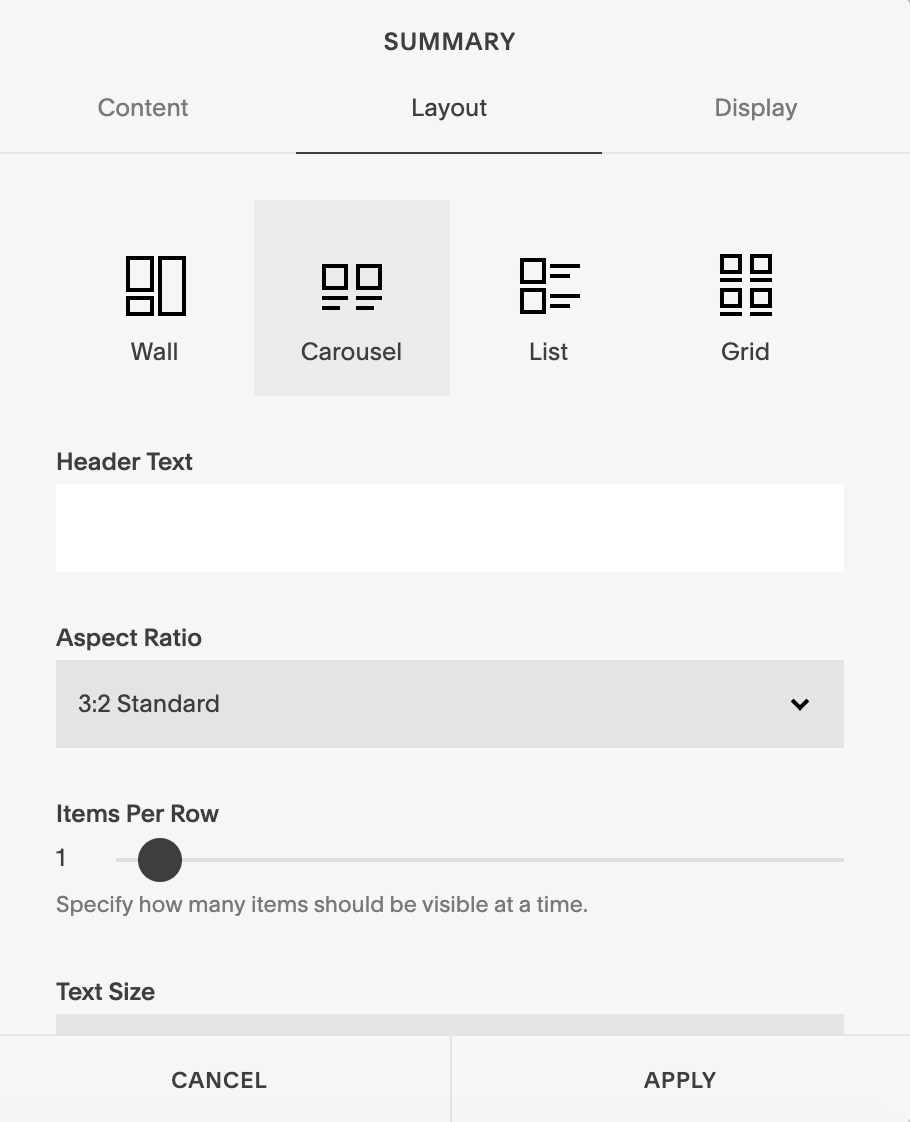
Under Layout, make sure it is set to Carousel and that you’re only showing one item at a time, just like this:
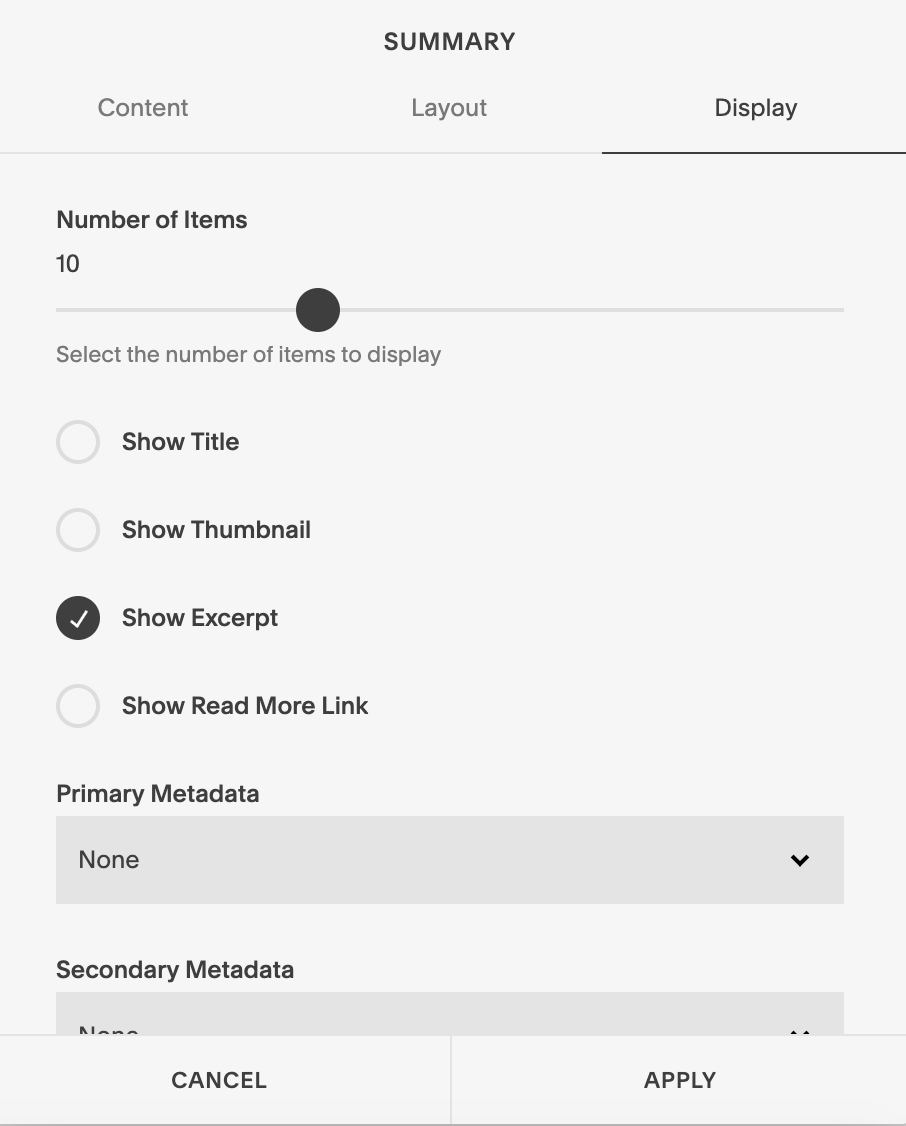
Then, finally under the Display settings, make sure all boxes are unchecked except for the Excerpts box. This will make sure that we don’t show the title or any other options for the testimonial!
Alright, y’all! That is the simple way to show off your testimonials using the Squarespace summary block!
Looking for an upgraded brand or website for your business? Look no further! I’d love to work with you on creating a fabulous brand and website. If you’d like to learn more about how we can work together, head on over to the web design services page!
You may also like:


